
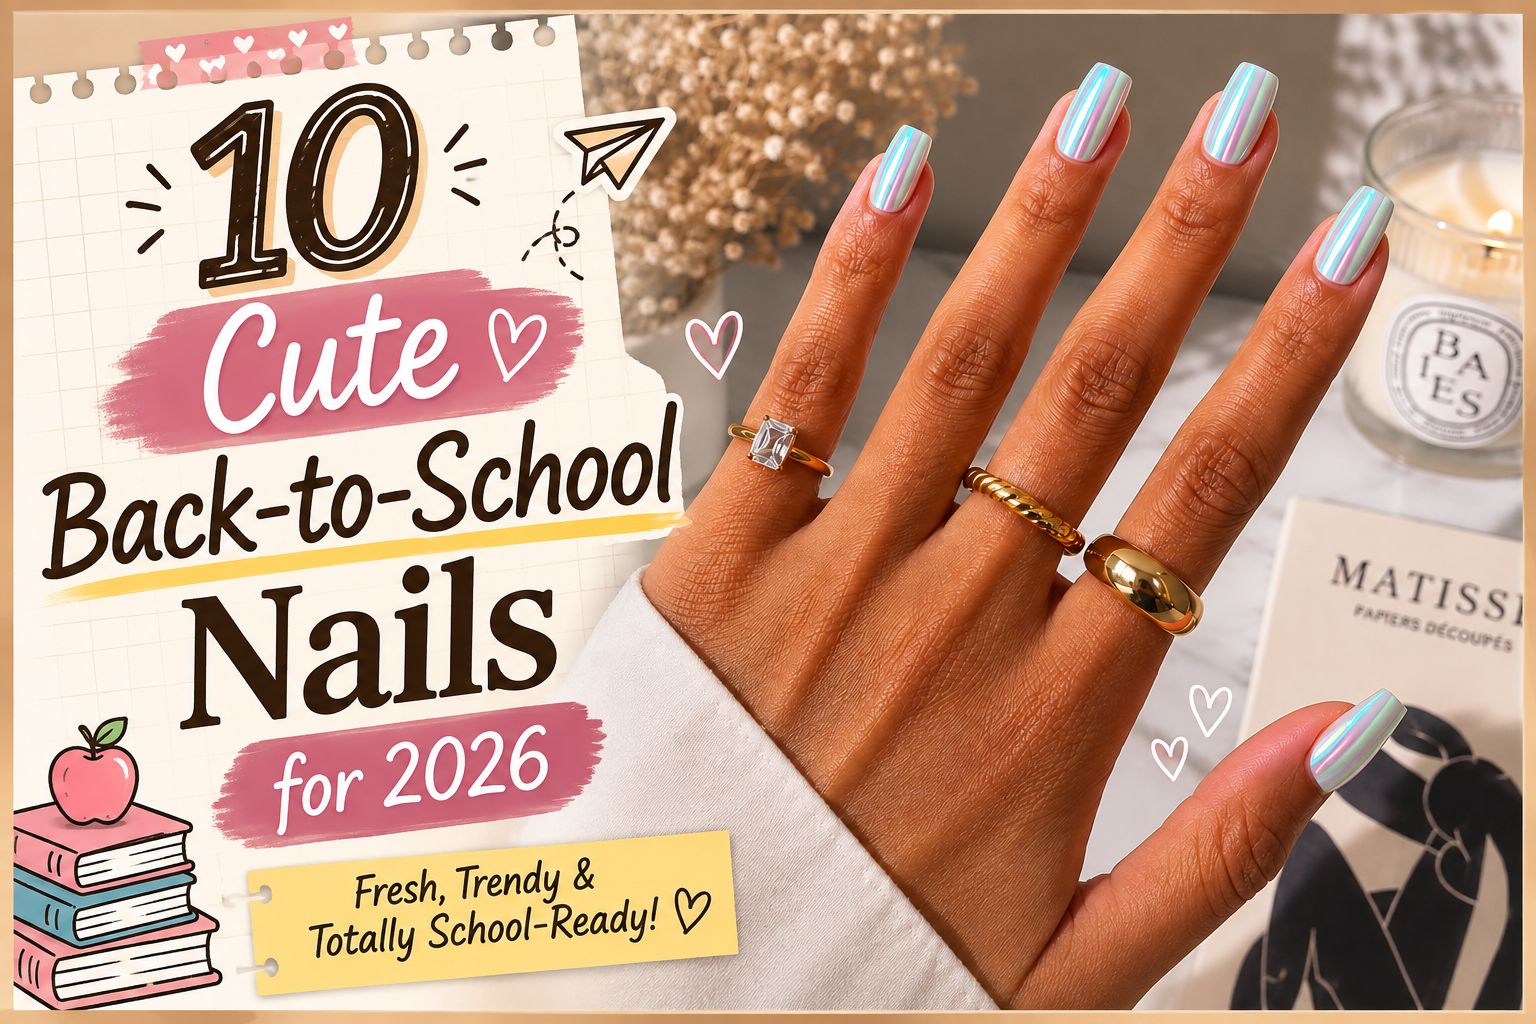
Back-to-school season always feels like the right time for a little style refresh, and I think your nails are a fun place to start. Heading back to school in late summer after months of beach days, late nights, and switching your brain to vacation mode isn’t always easy. Along with stocking up on school supplies and refreshing your wardrobe. There’s one more way to slay on the new academic year. After all, first impressions are everything. whether you’re going back to school, starting college, or simply excited for a new season.
Why Girls Are Crazy About Back-to-School Nails ?
These types of nails have become more than just a daily manicure—they’re a fun way to show your overall personality, confidence, and creativity before the new academic year begins. A new and recently fresh nails can instantly make your look feel more put-together, whether you prefer cute school-inspired details or a clean, minimalist finish.
Second thing, girls love them is the endless room for personalization. Pastel shades, French tips, tiny bows, glitter, chrome details, notebook lines, pencils, apples, and school colors can all be mixed and matched to create a manicure that feels uniquely yours.
Back-to-School Nail Designs to Try in 2026
From soft pastels and playful colors to tiny school-inspired details, these upcoming nail designs are made for your different styles and moods. Whether you love keeping your nails simple and minimal or prefer something more creative and eye-catching, there’s an idea here for you.
I’ve rounded up 10 cute back-to-school nail designs for 2026 that you can save for your next manicure. Pick your favorite, mix in your own colors, and make the look completely yours.
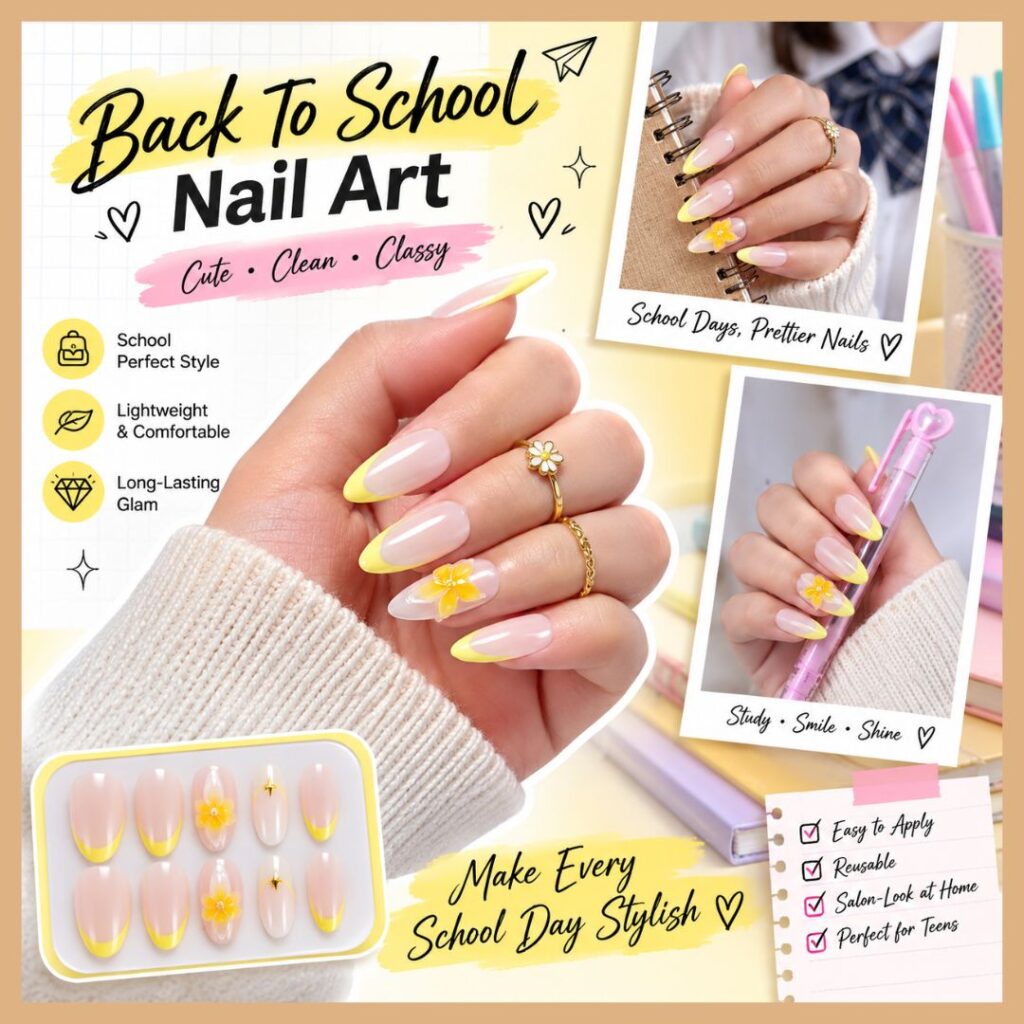
1.Pencil Yellow French Tips
Give your back-to-school manicure a cheerful twist with pencil-inspired yellow French tips. The bright yellow instantly brings to mind freshly sharpened pencils and new notebooks, making it a cute choice for the start of a new school year.
How to Make Pencil Yellow French Tips
1. Prep your nails: Start by shaping your nails. Clean the nail surface so your manicure goes on smoothly.
2. Apply a base coat: Add a thin layer of base coat to protect your natural nails and create an even surface.
3. Create the yellow tips: Apply a sheer nude or milky base first. Once dry, paint bright yellow French tips across each nail. You can make them thin for a subtle look or slightly thicker for a bolder finish.
4. Add pencil details: Use a fine nail-art brush and black polish to draw your own desired design.
5. Finish with top coat: Once your design is completely dry, apply a glossy top coat to seal the artwork and give your nails a smooth, shiny finish.
Pro Tip: For a more polished look, keep the yellow French tips the same thickness on every nail. If freehanding feels difficult, use French-tip guides or nail stickers to create clean, even lines.
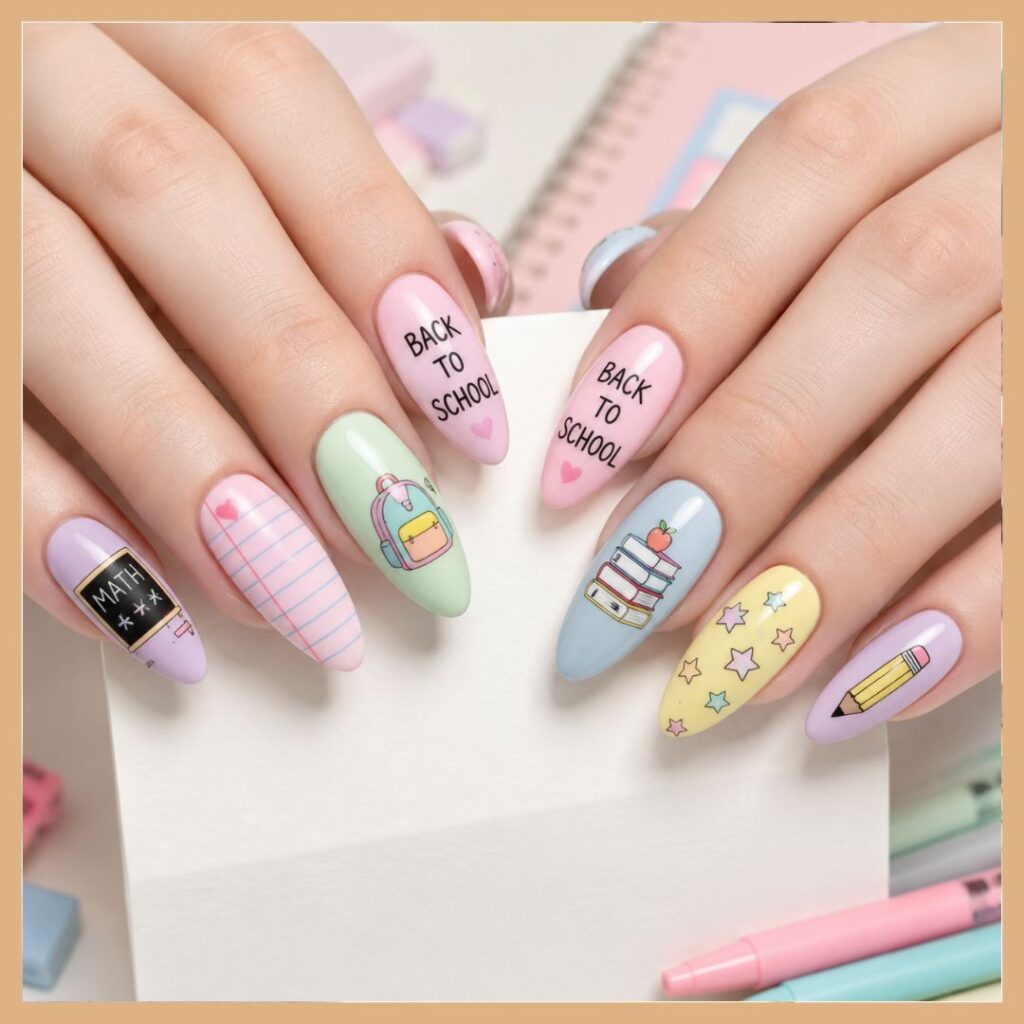
2.Pastel Back-to-School Nails
If your vibe is soft, pretty colors, Pastel Back-to-School Nails are an easy way to start the new school year with a fresh manicure. Think baby pink, lavender, powder blue, mint green, and buttery yellow blended into a soft, playful look. You can keep the design simple with pastel French tips or add tiny stars, hearts, bows, or school-inspired details for a little extra personality.
How to Make Pastel Back-to-School Nails
1. Prep your nails: Shape your nails into your preferred length and clean the nail surface to remove any natural oils.
2. Apply a base coat: Add a thin layer of base coat to protect your nails and help the manicure last longer.
3. Choose your pastel shades: Pick two to five soft colors such as pink, lavender, blue, green, and yellow. You can use one shade on each nail or create a colorful mix.
4. Apply the colors: Paint each nail with your chosen pastel shade. For a softer finish, use two thin coats instead of one thick layer.
5. Add cute details: Once the base is dry, add tiny hearts, stars, dots, bows, or small school-inspired details. Keep the artwork minimal so the pastel colors remain the focus.
6. Seal the design: Finish with a glossy top coat to smooth everything out and give your pastel back-to-school nails a fresh, shiny finish.
Pro Tip: Pastel shades can sometimes look uneven after the first coat, so don’t worry if they seem slightly sheer. Two thin coats usually create a much smoother and more even finish than applying one heavy coat.
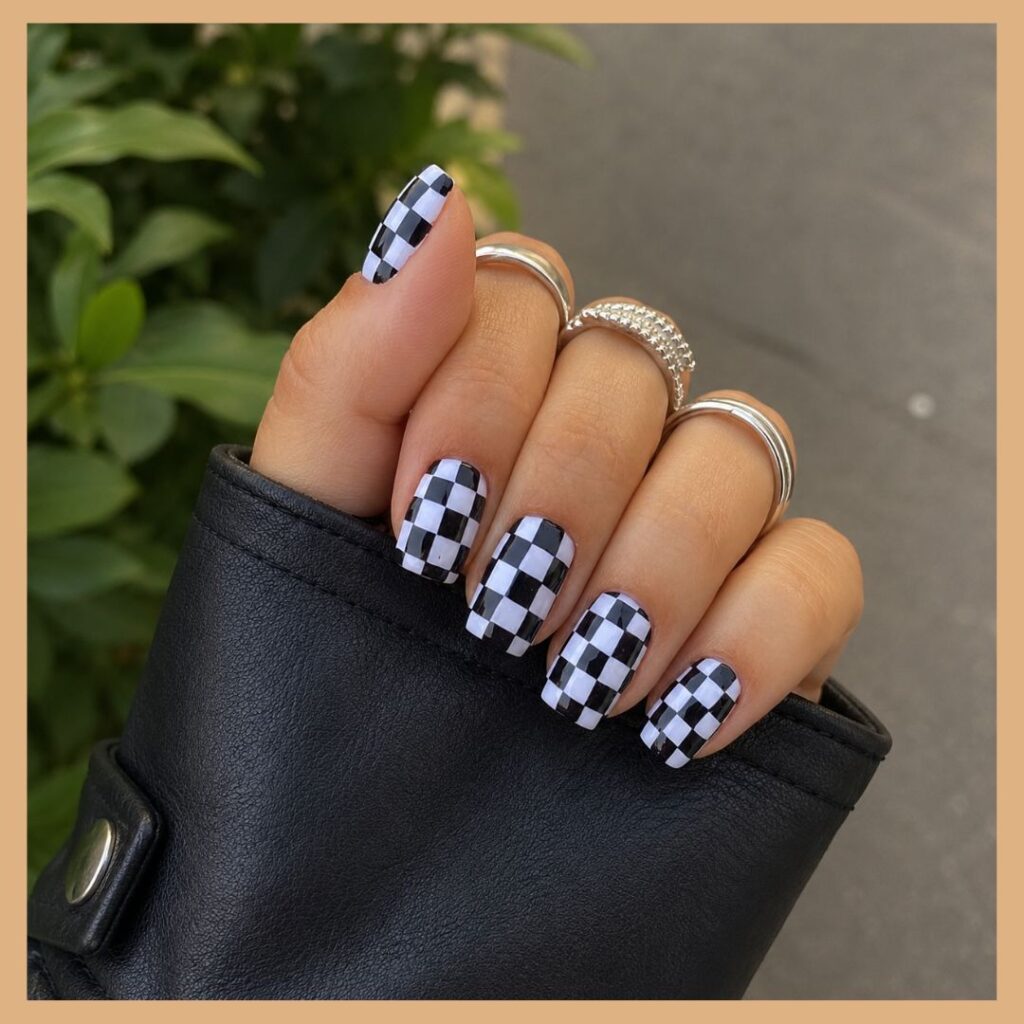
3.Checkerboard School Nails
These classic checkerboard pattern adds a playful, graphic touch while still looking polished. You can stick with black and white for a timeless look or swap in your favorite school colors for a more personalized manicure.
How to Make Checkerboard School Nails
1. Prep your nails: Shape your nails and gently push back your cuticles. Clean the nail surface to create a smooth base for your design.
2. Apply a base coat: Start with a thin layer of base coat to protect your natural nails and help the manicure stay in place.
3. Paint the base color: Apply a white, nude, or light-colored polish as your base. Let it dry completely before creating the checkerboard pattern.
4. Create the squares: Using a fine nail-art brush, draw thin horizontal and vertical lines to form small squares.
5. Add school colors: For a fun twist, use your school colors instead of traditional black and white.
6. Seal the design: Once everything is dry, apply a glossy top coat to smooth the pattern and protect your artwork.
Pro Tip: Keep the checkerboard squares small and evenly spaced for a cleaner finish. If freehanding feels tricky, use thin nail-art tape to create straight lines and make the pattern much easier to control.
4.Cute Smiley Face Nails
Bring a little happiness to your fingertips with Cute Smiley Face Nails. This playful design is perfect for back-to-school season because it feels cheerful, youthful, and easy to personalize. Try bright yellow smiley faces over a nude or pastel base, or mix different expressions across your nails for a fun manicure that instantly lifts your look.
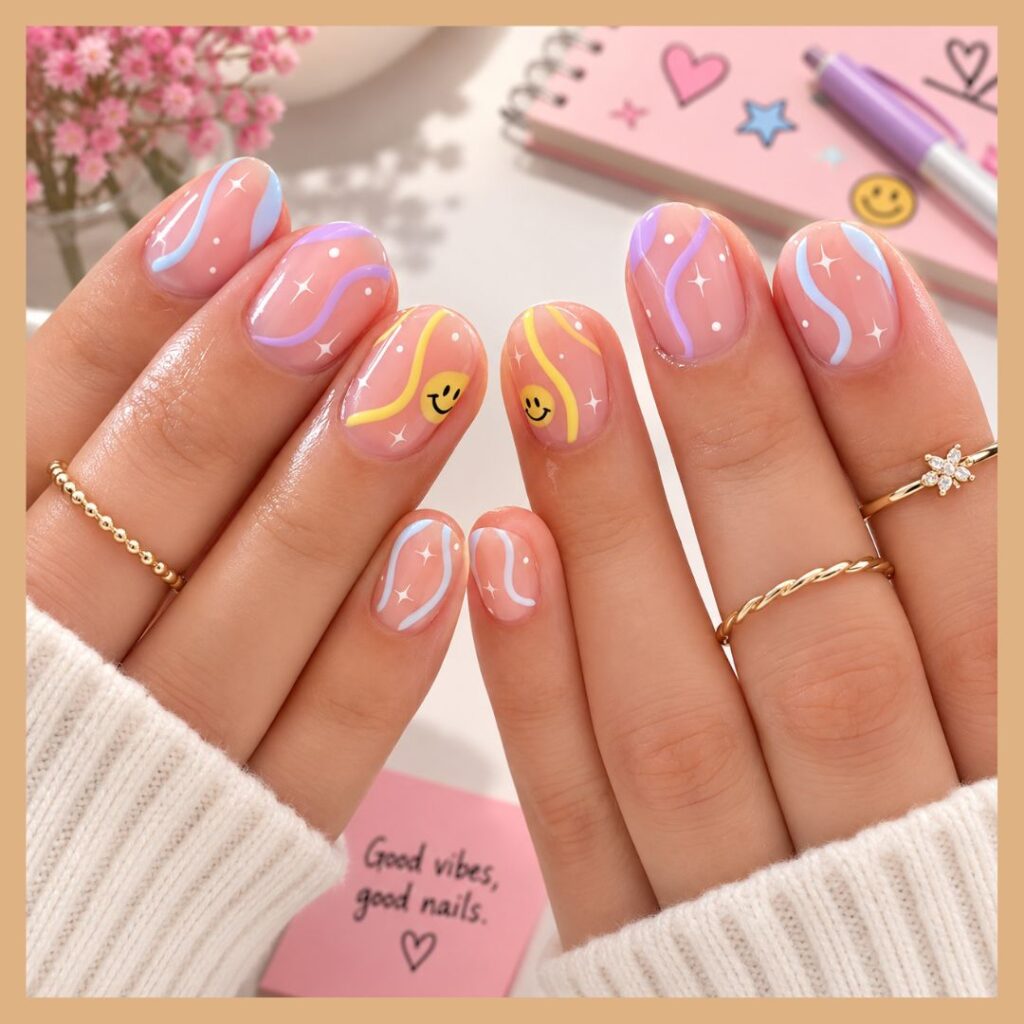
How to Make Cute Smiley Face Nails
1. Prep your nails: Shape your nails to your desired length and gently push back your cuticles. Clean the nail surface so your polish applies smoothly.
2. Apply a base coat: Add a thin layer of base coat to protect your natural nails and create an base surface.
3. Choose your base color: Apply a soft nude colors as you wish. Let it dry before adding the smiley faces.
4. Create the smiley faces: Use yellow polish to make small round dots or circles on each nail.
5. Add the details: Once the yellow circles are dry, use black nail polish to create two tiny eyes and a curved smile. You can make some faces wink, smile, or have little heart-shaped eyes for extra personality.
6. Finish with top coat: Apply a clear glossy top coat to protect your artwork and give your smiley face nails a smooth, shiny finish.
Pro Tip: Don’t worry about making every smiley face identical. Slightly different expressions make the manicure feel more playful and handmade. Keep the faces small if you want a cute, polished look that works well for school.
5. School Color French Tips
A simple design that feels stylish without being too loud. Instead of classic white tips, use your favorite school colors to create a manicure that feels personal and fun. You can keep the rest of the nail sheer or nude for a clean look, or add tiny stripes, stars, or initials for extra detail.
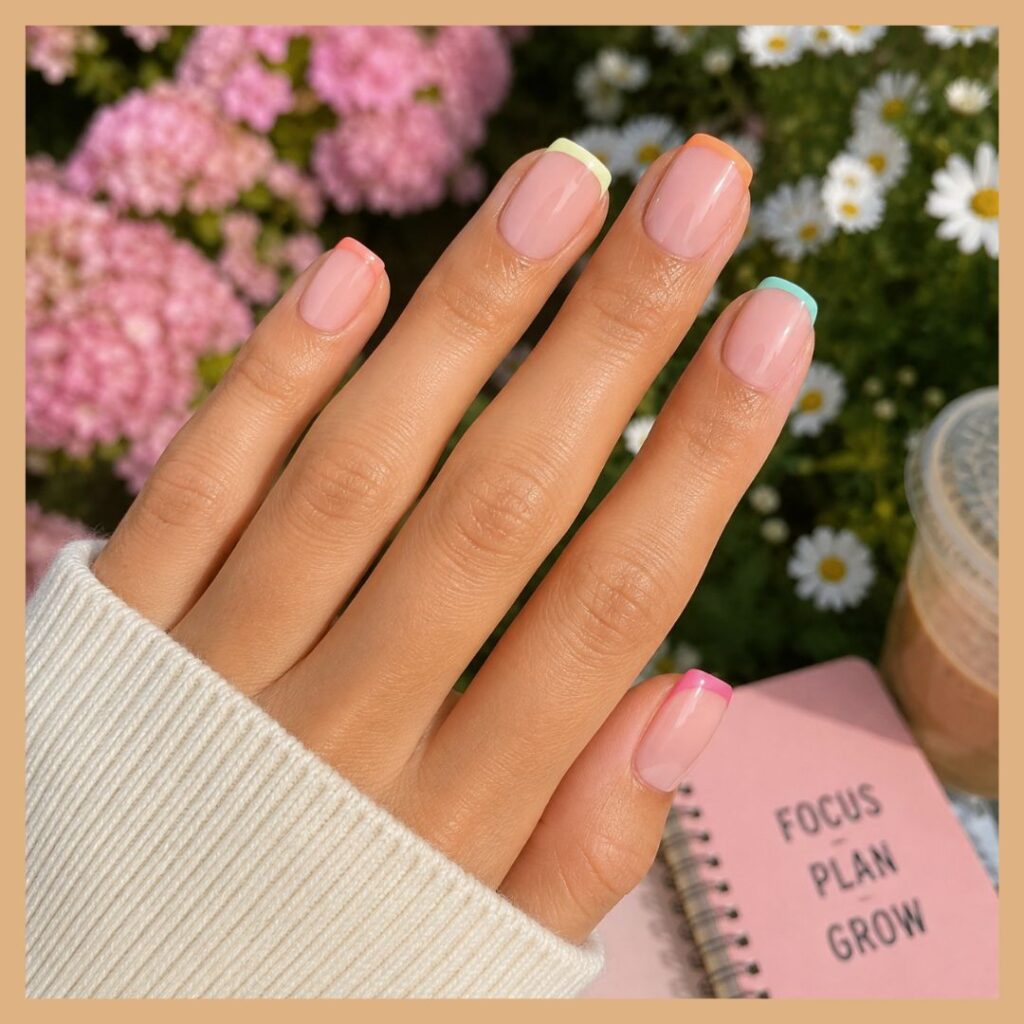
How to Make School Color French Tips
1. Prep your nails: Shape and clean your nails and gently push back the cuticles.
2. Apply a base coat: Add a thin layer of base coat to protect your nails and help the manicure last longer.
3. Add your base color: Apply a sheer pink, nude, or milky polish to each nail. Let it dry completely before creating the French tips.
4. Create the French tips: Choose one or two school colors and carefully paint them across the tips of your nails. You can use one solid color or alternate the colors from nail to nail.
5. Add extra details: For a more personalized look, add a thin stripe underneath the French tip, a tiny star, your school initial, or a simple dot detail.
6. Seal your manicure: Finish with a glossy top coat to smooth the design, protect the tips, and give your nails a polished shine.
Pro Tip: Use French-tip guides or nail-art tape if you want perfectly even lines. For a more modern look, try a thin micro-French tip in your school colors rather than a thick traditional tip.
6.Cute Bow Back-to-School Nails
Add a sweet and pookie touch to your school-day look with Bow Back-to-School Nails. Tiny bows instantly make a manicure feel playful and polished, while soft shades like pink, white, lavender, and baby blue keep the look fresh and wearable. You can place a single bow on each accent nail or create tiny bows across a glossy French manicure.
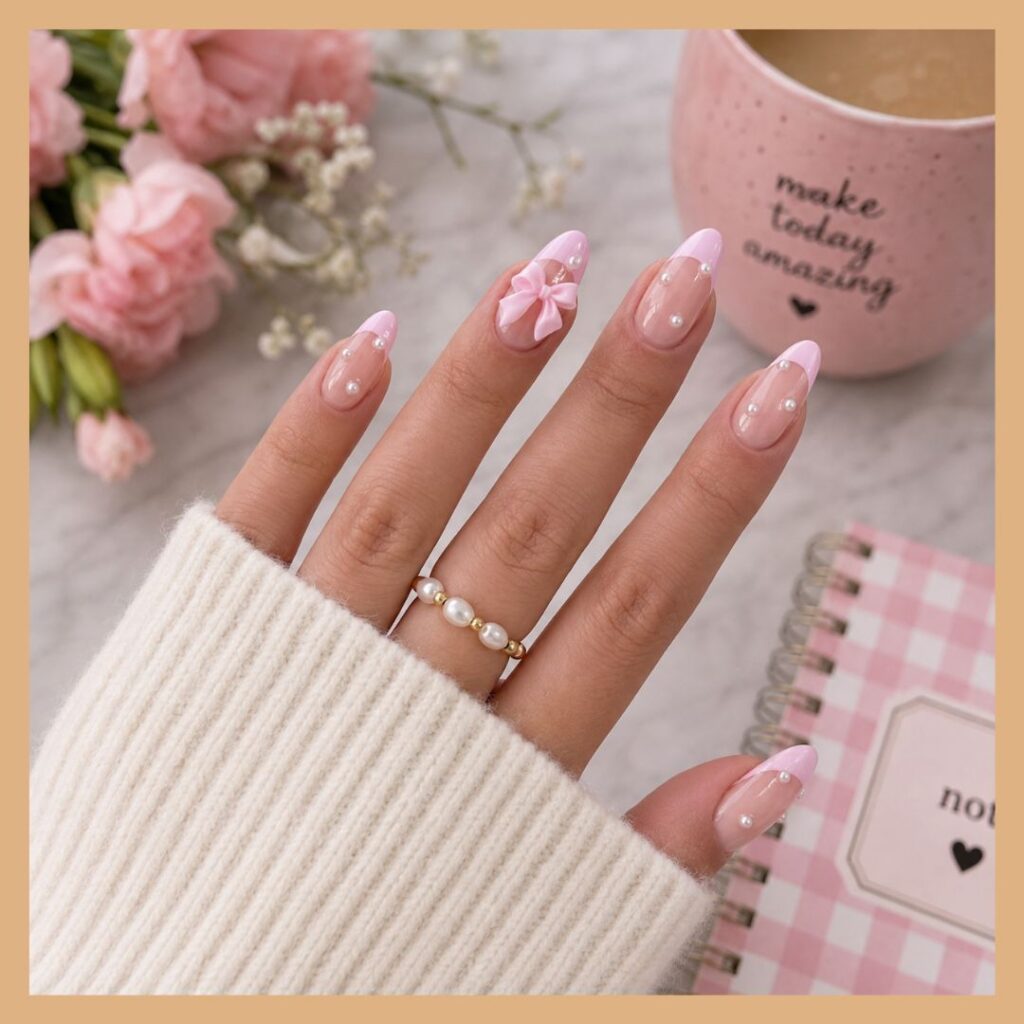
How to Make Bow Back-to-School Nails
1. Prep your nails: Shape your nails and gently push back your cuticles.
2. Apply a base coat: Add a thin layer of base coat to protect your natural nails and help the design last longer.
3. Choose your base color: Apply a soft pink, nude, milky white, lavender, or baby blue polish. Let it dry completely before adding the bows.
4. Create the bows: Using a fine nail-art brush, draw two small loops close together to form the bow. Add a tiny dot or line in the center to connect the loops and create the finished shape.
5. Add extra details: For a little more sparkle, add tiny rhinestones, glitter, dots, or a delicate French tip around the bow. Keep the details small so the manicure stays elegant.
6. Seal your design: Apply a clear glossy top coat once the artwork is dry. This will protect the bows and give your back-to-school nails a smooth, shiny finish.
Pro Tip: Keep your bows small and delicate for a more polished school-friendly look. If freehanding feels difficult, use tiny nail stickers or decals to get a neat bow shape without the extra effort.
7.Glitter School Spirit Nails
Add a little sparkle to your back-to-school look with Glitter School Spirit Nails. This design is perfect when you want to show off your school colors while keeping your manicure fun and eye-catching. You can use glitter polish for French tips, accent nails, or tiny details while keeping the rest of the manicure clean and polished.
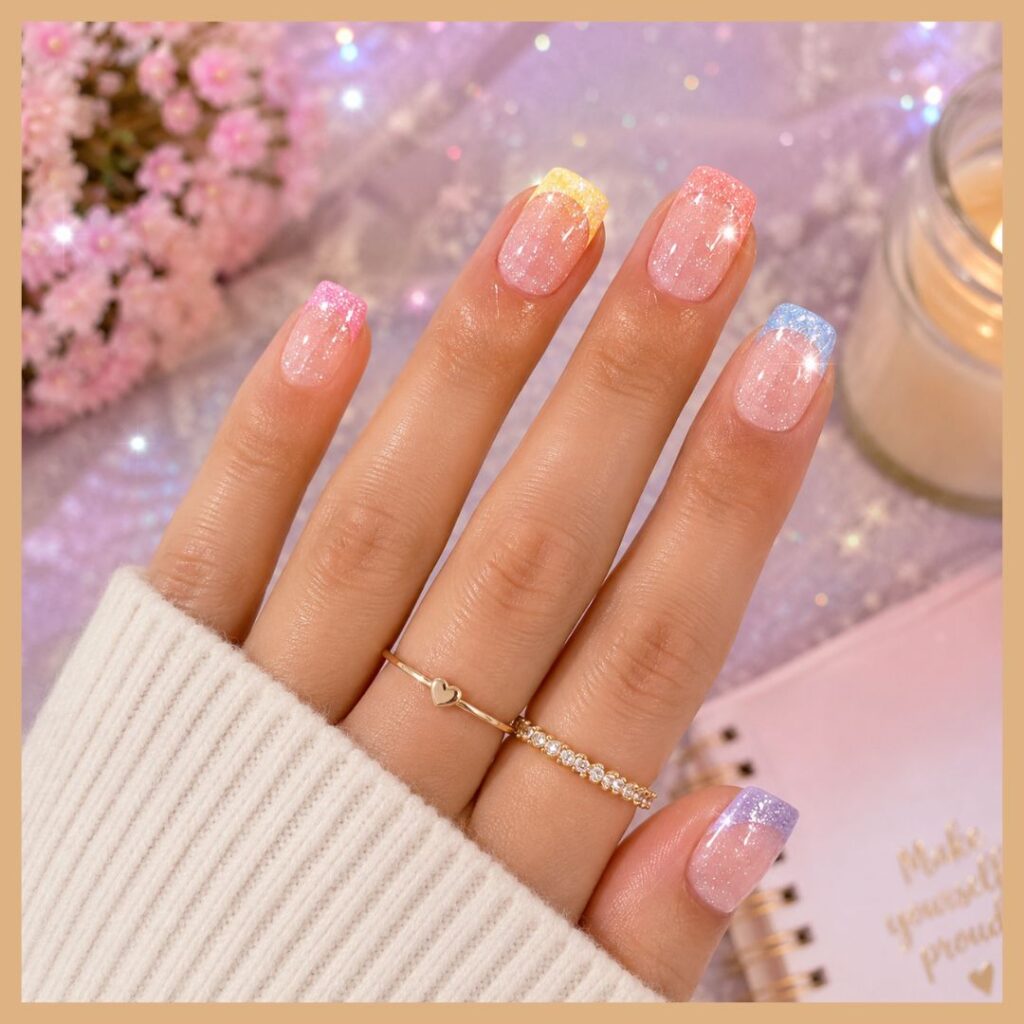
How to Make Glitter School Spirit Nails
1. Prep your nails: Prepare your nail well.
2. Apply a base coat: Use a thin laye to protect your natural nails and create a smooth surface.
3. Choose your school colors: Pick one or two colors that represent your school. You can use matching glitter polishes or combine a solid polish with glitter accents.
4. Create the glitter design: Apply your base color and let it dry. Add glitter to the French tips, one or two accent nails, or create small glitter stripes for a subtle school-spirit look.
5. Add extra details: For more personality, add tiny stars, hearts, dots, or your school initials using a fine nail-art brush.
6. Seal the sparkle: Finish with a generous layer of glossy top coat to smooth the glitter and help your manicure stay shiny.
Pro Tip: For more intense sparkle, apply two thin layers of glitter rather than one thick coat. If you want a more subtle school-ready look, concentrate the glitter on just one or two accent nails.
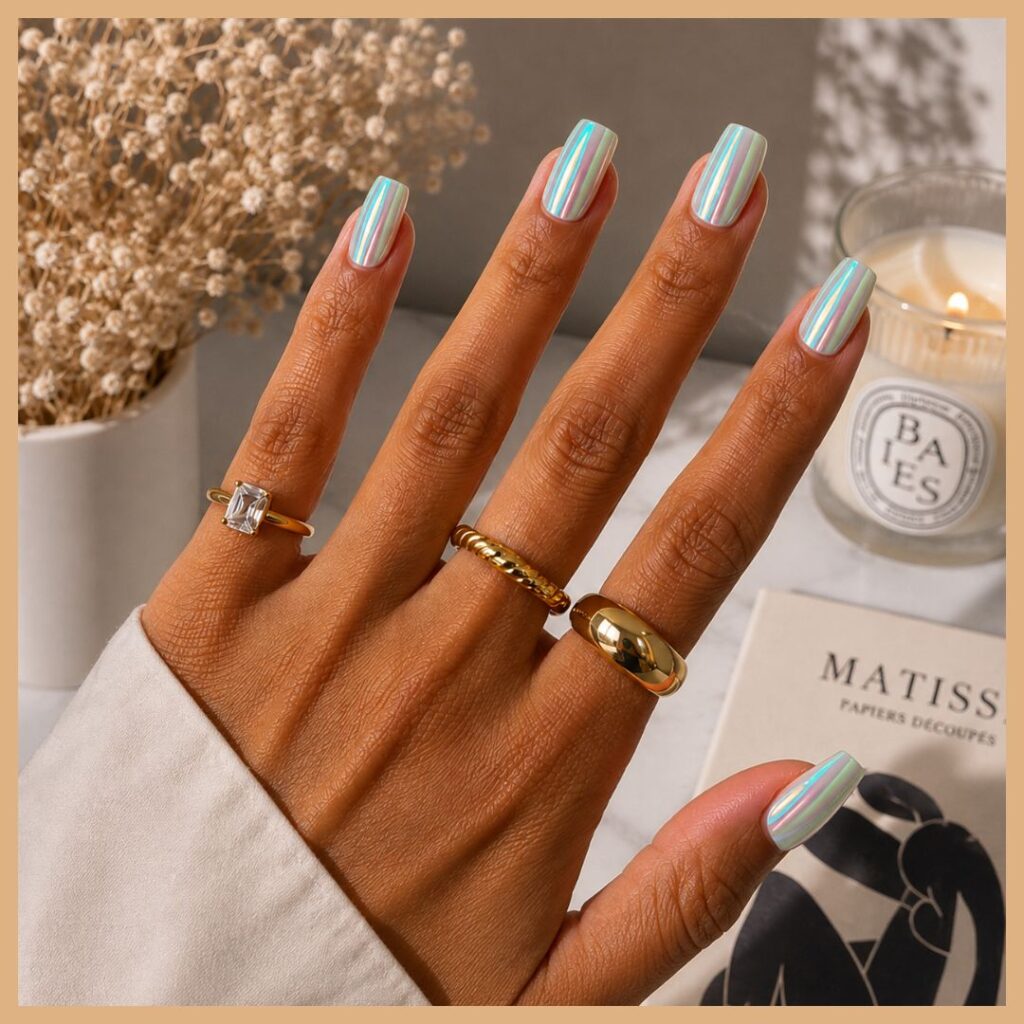
8.Chrome School Spirit Nails
This look combines the shine of chrome with your favorite school colors, creating a manicure that feels bold, polished, and fashion-forward. You can use chrome French tips, metallic accents, or a chrome finish on one or two nails while keeping the rest simple.
How to Make Chrome School Spirit Nails
1. Prep your nails: Shape your nails to your preferred length.
2. Apply a base coat: Add a thin layer of base coat to protect your natural nails and help your manicure last.
3. Apply your school color: Choose one of your school colors and apply a thin, even layer.
4. Create the chrome effect: Apply a gel polish and cure it according to the product instructions. Once ready, gently rub chrome powder over the desired areas using a sponge applicator until you achieve a smooth metallic shine.
5. Add school-spirit details: Try chrome French tips, metallic stripes, tiny stars, initials, or alternating school colors. You can also keep one nail fully chrome as an accent.
6. Seal the look: Carefully apply a compatible top coat to protect the chrome design and keep the surface glossy and smooth.
Pro Tip: For a clean chrome finish, keep the nail surface completely smooth before applying the powder. If you want the look to feel more school-friendly, use chrome only on the tips.
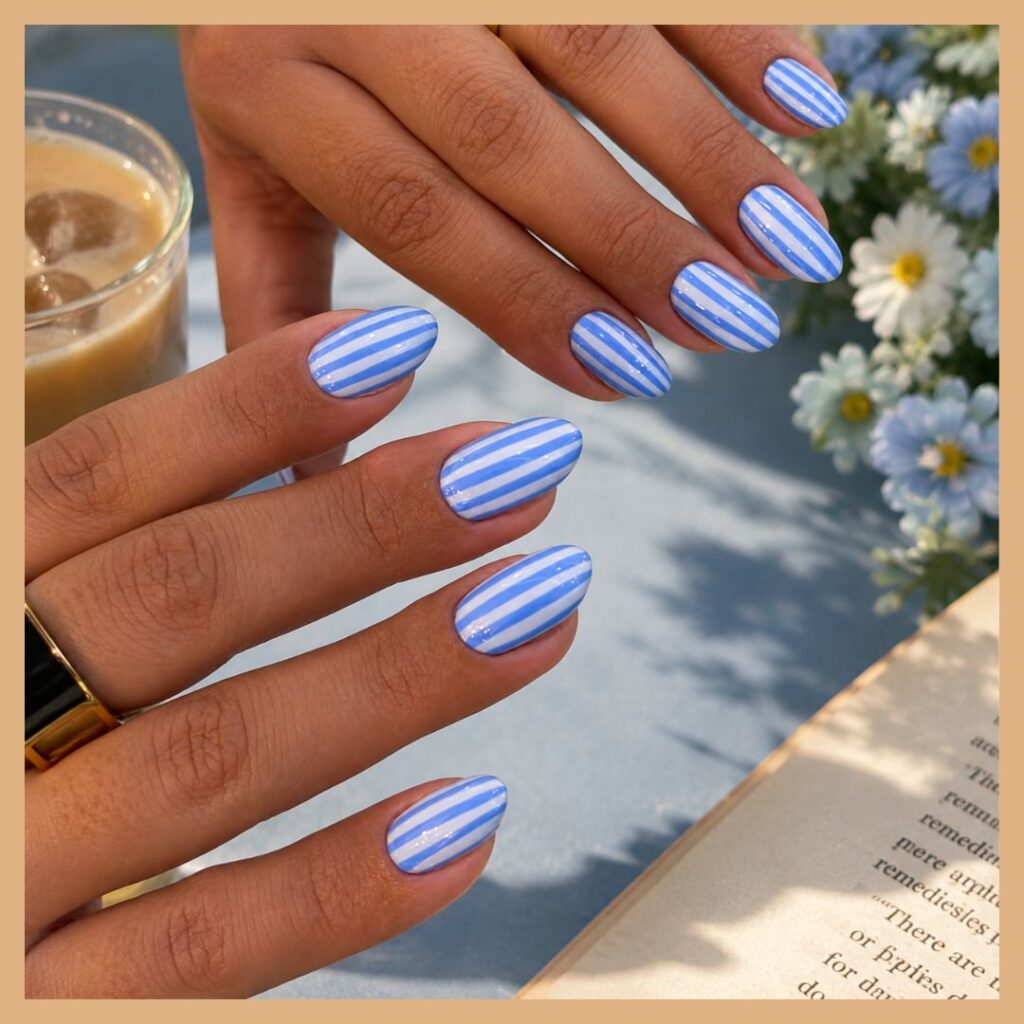
9. Varsity Stripe Nails
Bring a sporty, confident vibe to your back-to-school manicure with Varsity Stripe Nails. Inspired by classic varsity jackets and school team colors, this design is perfect for showing a little school spirit while keeping your nails stylish.
How to Make Varsity Stripe Nails
1. Prep your nails: Shape and clean your nails.
2. Apply a base coat: Add a thin layer to protect your natural nails and create a smooth surface.
3. Choose your colors: Pick two or three school colors that work well together.
4. Create the stripes: Apply your base color and let it dry. Using a fine nail-art brush, paint two or three thin, parallel lines across each nail. You can place the stripes vertically, horizontally, or diagonally.
5. Add a varsity detail: For extra personality, add a tiny star, school initial, number, or simple heart to one or two accent nails.
6. Finish with top coat: Once the design is completely dry, apply a glossy top coat to smooth the stripes and protect your artwork.
Pro Tip: Use nail-art striping tape to create crisp, straight lines without struggling with a brush. Keep the stripes consistent in thickness and spacing for that clean varsity-inspired finish.
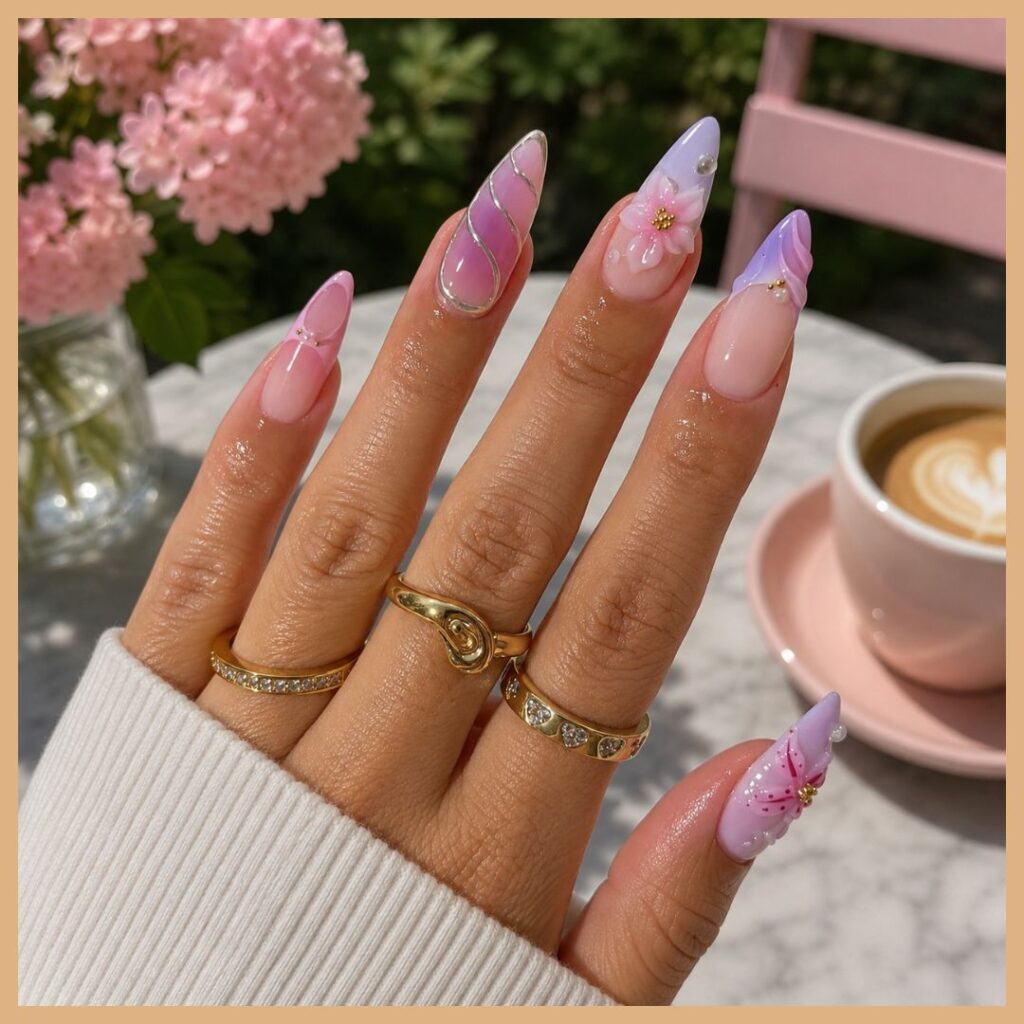
10. Pink & Purple School Nails
If you love feminine colors with a playful twist, Pink & Purple School Nails are a beautiful choice for the new school year. The combination of soft pink and purple feels youthful, cheerful, and easy to personalize. You can keep the look simple with alternating colors or add tiny hearts, stars, bows, or school-inspired details for extra charm.
How to Make Pink & Purple School Nails
1. Prep your nails: Shape your nails to your preferred length and gently push back your cuticles. Clean the nail surface to remove any oils and create a smooth base.
2. Apply a base coat: Add a thin layer of base coat to protect your natural nails and help your manicure last longer.
3. Choose your shades: Pick a soft pink and purple that complement each other. Pastel shades create a delicate look, while brighter tones make the manicure more playful.
4. Apply the colors: Paint your nails by alternating pink and purple, or use one shade as the main color and the other for French tips or accent nails. Apply two thin coats for an even finish.
5. Add cute school details: Use a fine nail-art brush to add tiny bows, hearts, stars, pencils, books, or ABC letters. Keep the details small so the pink and purple combination remains the focus.
6. Seal the design: Finish with a glossy top coat to protect your artwork and give your pink and purple school nails a smooth, polished shine.
Pro Tip: For a more sophisticated look, combine pastel pink and lavender with a sheer or milky base instead of using bold colors on every nail. A few delicate accent details can make the manicure feel cute without becoming too busy.
Start Your Academic Year In Style
Back-to-school season is the perfect time to have a little fun with your style, and your nails are an easy place to start. Personally, I think the best nail arts is the one that makes you feel good when you look at your hands. You don’t have to choose the most detailed design or follow every trend. Pick the colors you love, add a small detail that feels like you, and make the manicure your own.
So, before the new school year begins, save your favorite from these 25 trendy back-to-school nails for 2026 and give yourself a fresh little style moment.
Loved these back-to-school nail ideas? Don’t stop here. Explore more fashion, beauty, nail inspiration, and easy style ideas on the Izoate Fashion blog, where we’re always sharing fresh looks and trends. And if you love discovering new inspiration, follow us on our social media platforms to stay connected with our latest posts, nail ideas, beauty tips, and everyday style inspiration. Come along and make every look your own with Izoate Fashion.