
Discover cute pumpkin Halloween nails for 2026, from tiny jack-o’-lanterns to chic pumpkin French tips that bring a playful fall mood to your manicure. Changing leaves, crisp autumn air, and pumpkins appearing everywhere can only mean one thing: Halloween season is here. And what better way to embrace the spooky spirit than with a fresh set of cute Halloween pumpkin nails?
As pumpkins become the stars of our seasonal décor, flavors, and fall traditions, they are making their way onto our fingertips, too. From adorable mini pumpkins and classic Jack-O’-Lantern nails to playful pumpkin spice-inspired designs, these Halloween nail ideas bring just the right balance of sweet, spooky, and stylish.
Whether you love a subtle pumpkin accent or want your manicure to make a statement, there is a look for every Halloween mood. Ahead, we’re sharing some of the cutest pumpkin Halloween nail designs to add to your inspiration board, along with practical tips, tricks, and easy ways to recreate the look at home.
Discover cute pumpkin Halloween nails for 2026, from tiny jack-o’-lanterns to chic pumpkin French tips that bring a playful fall mood to your manicure.
10 Halloween Nails Designs That You Love To Try
1. Mini Pumpkin Halloween Nails
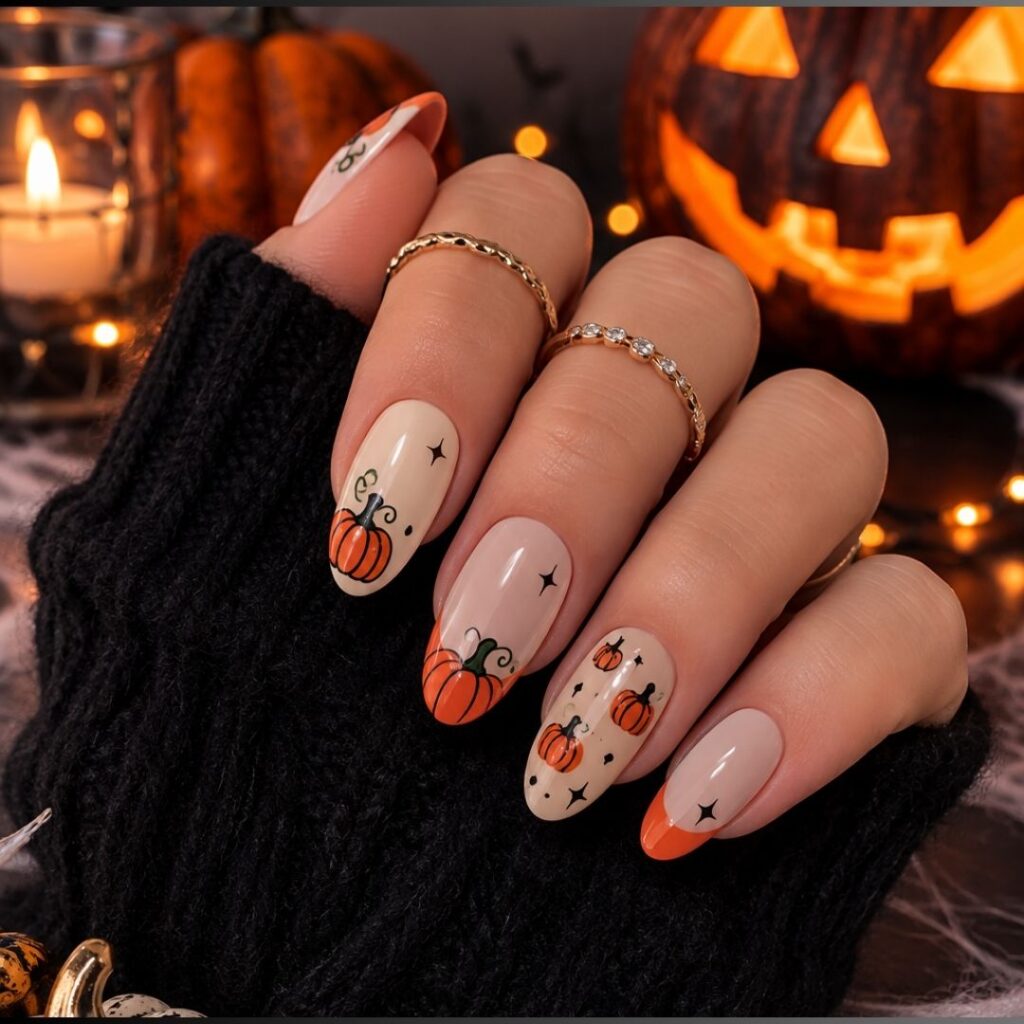
Tiny pumpkins are a perfect choice if you love subtle Halloween nail art. A nude, cream, or soft pink base keeps the manicure polished, while miniature orange pumpkins create the seasonal statement. The beauty of this design is its versatility. You can place one tiny pumpkin on each nail or make one accent nail the focal point.
How to Make It
- Prep Your Nails: Clean your nails, gently shape them, and push back the cuticles.
- Apply the Base: Add a thin layer of base coat followed by your preferred nude or cream polish.
- Create the Pumpkin: Use a fine nail-art brush to paint a small orange circle or slightly oval pumpkin shape.
- Add the Details: Use black polish to create tiny eyes and a smile. Add a small green or brown stem.
- Seal the Look: Once everything is completely dry, apply a glossy top coat.
Pro Tip: Keep the pumpkins small. On shorter nails, delicate artwork creates a more refined finish and leaves enough negative space for the manicure to breathe.
2. Smiley Pumpkin Halloween Nails
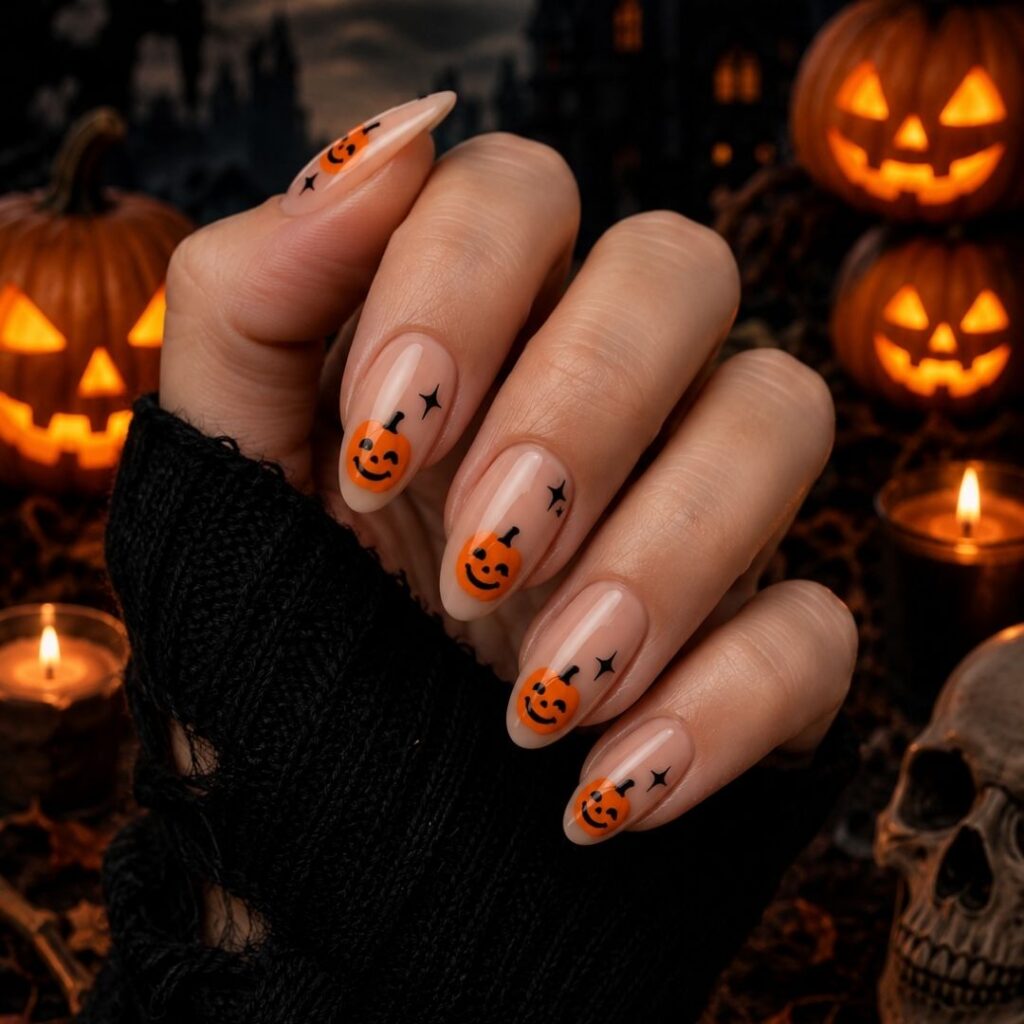
Who says Halloween nails have to look spooky? Smiley pumpkins bring a playful, almost whimsical energy to the manicure. Start with a neutral or pastel base and add tiny orange pumpkins with simple smiling faces. You can make every pumpkin slightly different for a hand-drawn effect.
How to Make It
- Create the Base: Apply a neutral, pale pink, cream, or soft beige polish.
- Paint the Pumpkins: Create small orange pumpkin shapes using a dotting tool or fine brush.
- Add the Faces: Use black polish for tiny eyes and curved smiles.
- Finish the Details: Add little stems and leaves.
- Apply Top Coat: Seal everything with a smooth layer of top coat.
Pro Tip: Don’t make every face identical. Slight variations make the pumpkins feel more playful and intentionally hand-painted.
3. Pumpkin French Tip Nails
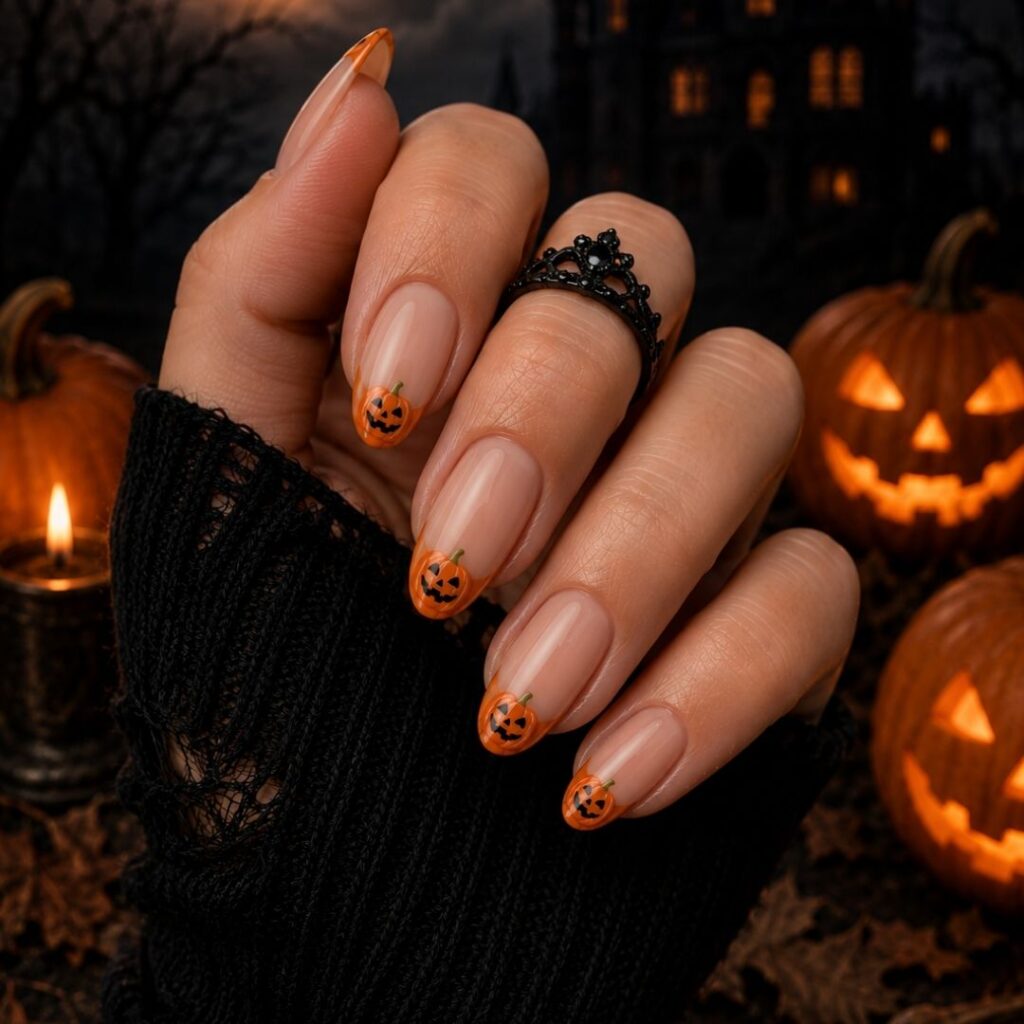
For a more elevated interpretation, combine the classic French manicure with tiny pumpkin details. This is one of my favorite approaches because it feels Halloween-inspired without losing its chic quality. Use a nude or sheer base with white, orange, or black French tips, then add a tiny pumpkin to one or two accent nails.
How to Make It
- Apply a Sheer Base: Use a nude or milky polish.
- Create the French Tips: Carefully paint thin white, orange, or black tips.
- Add Mini Pumpkins: Place a small pumpkin near the cuticle or on an accent nail.
- Refine the Details: Add tiny stems or leaves.
- Seal With Top Coat: Finish with a glossy or soft matte top coat.
Pro Tip: Keep the French line thin. A delicate tip makes the pumpkin artwork feel more sophisticated and less visually heavy.
4. Cute Pumpkin Accent Nails
If you prefer minimalist nail art, you do not need pumpkins on every finger. Accent nails can deliver the entire Halloween mood with much less effort. Keep most nails in a solid nude, cream, orange, or black shade and dedicate one or two nails to pumpkin artwork.
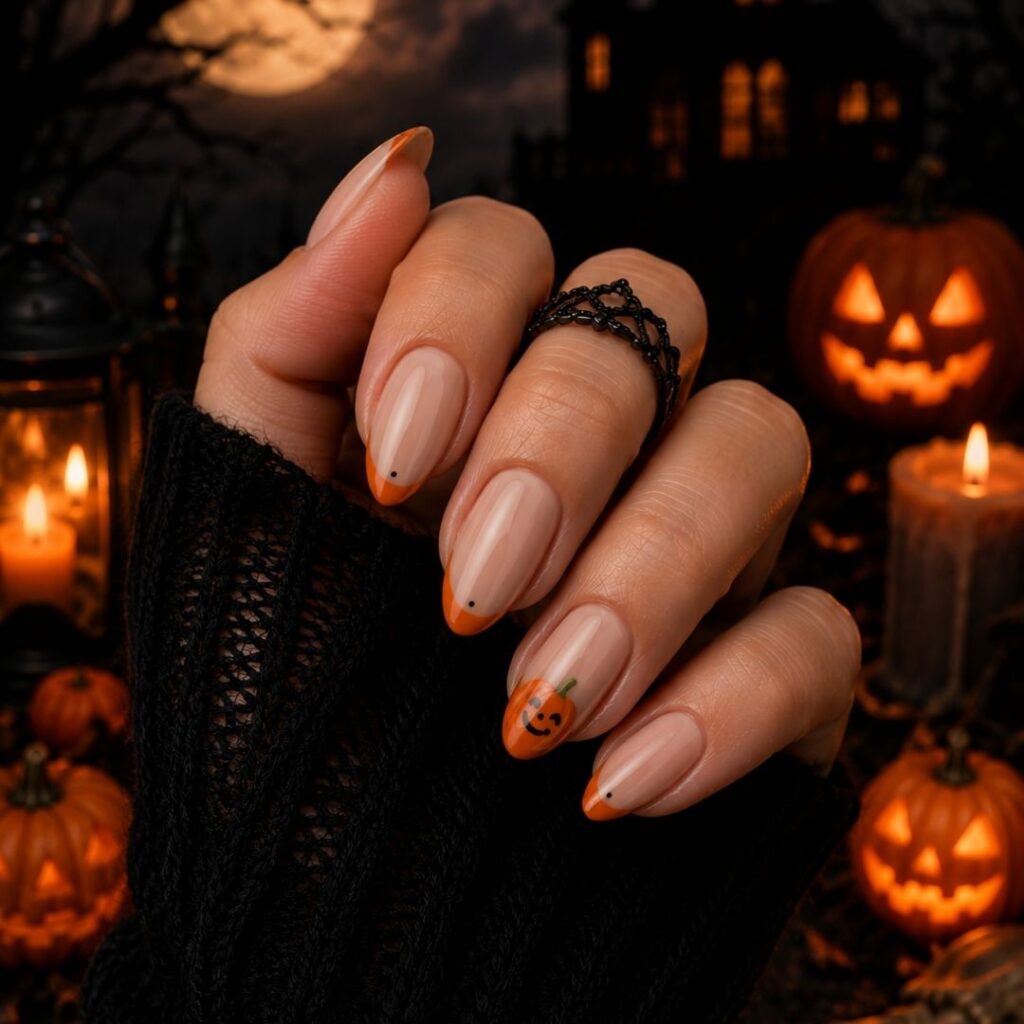
How to Make It
- Choose Your Palette: Pick two or three coordinating shades.
- Paint the Solid Nails: Apply your main shade to most nails.
- Create the Accent: Paint a pumpkin on one or two nails.
- Add Seasonal Details: Introduce tiny leaves, stars, dots, or curved lines.
- Finish: Apply top coat across the entire manicure.
Pro Tip: Use accent nails to create contrast. If most nails are neutral, a bright pumpkin instantly becomes the focal point.
5. Pumpkin and Ghost Halloween Nails
For a manicure that leans more traditionally Halloween, pair adorable pumpkins with tiny ghosts. The combination gives you the sweet-and-spooky balance that makes seasonal nail art so fun. Use orange pumpkins, white ghosts, and small black details against a neutral or dark background.
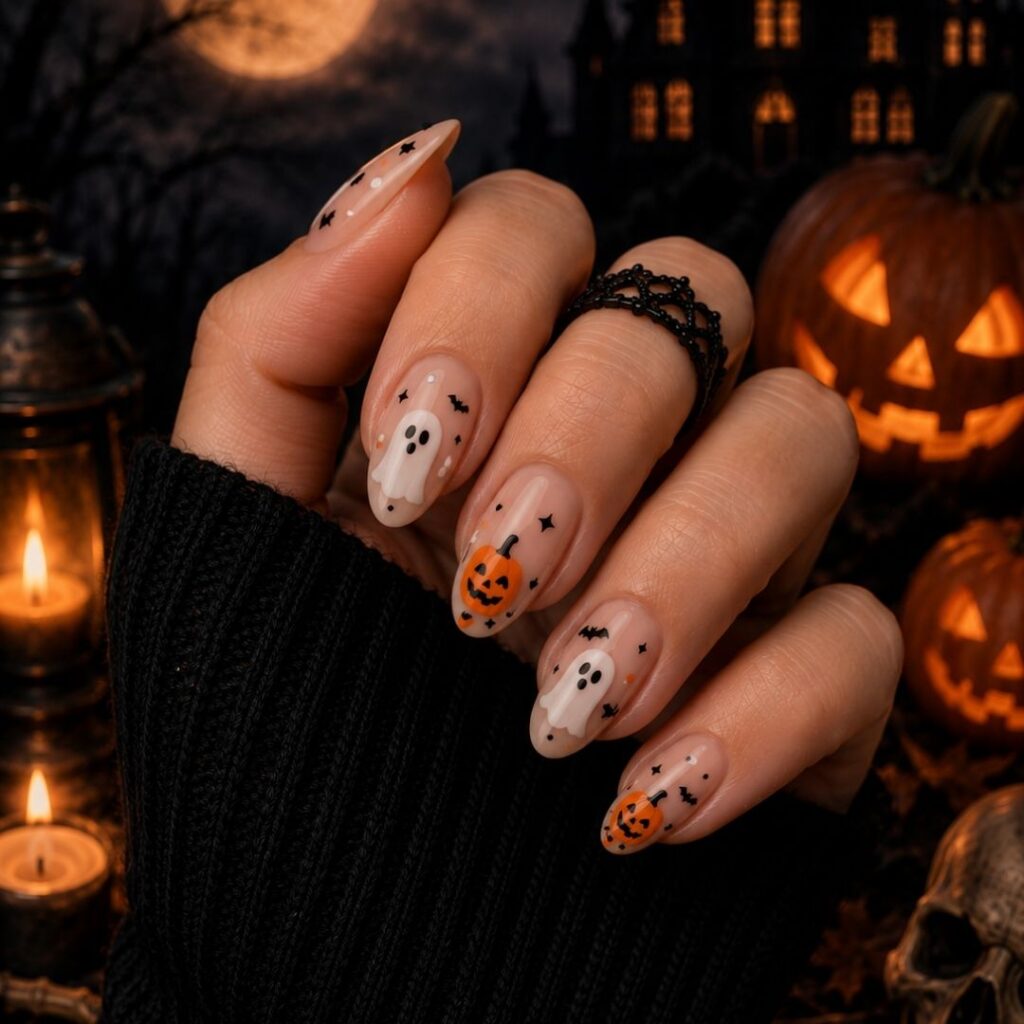
How to Make It
- Apply Your Base: Choose nude, cream, pale pink, or black.
- Paint the Pumpkins: Create small orange pumpkins on selected nails.
- Add Ghosts: Use white polish to create simple ghost shapes.
- Add Faces: Use black polish for tiny eyes and expressions.
- Seal Everything: Finish with top coat.
Pro Tip: Give each character enough space. Crowding pumpkins and ghosts together can make short nails look visually busy.
6. Pastel Pumpkin Halloween Nails
Halloween does not have to mean black and orange. Pastel pumpkin nails offer a softer, more fashion-forward interpretation of the season. Think pastel peach, lavender, baby pink, butter yellow, sage green, and cream paired with miniature pumpkins.
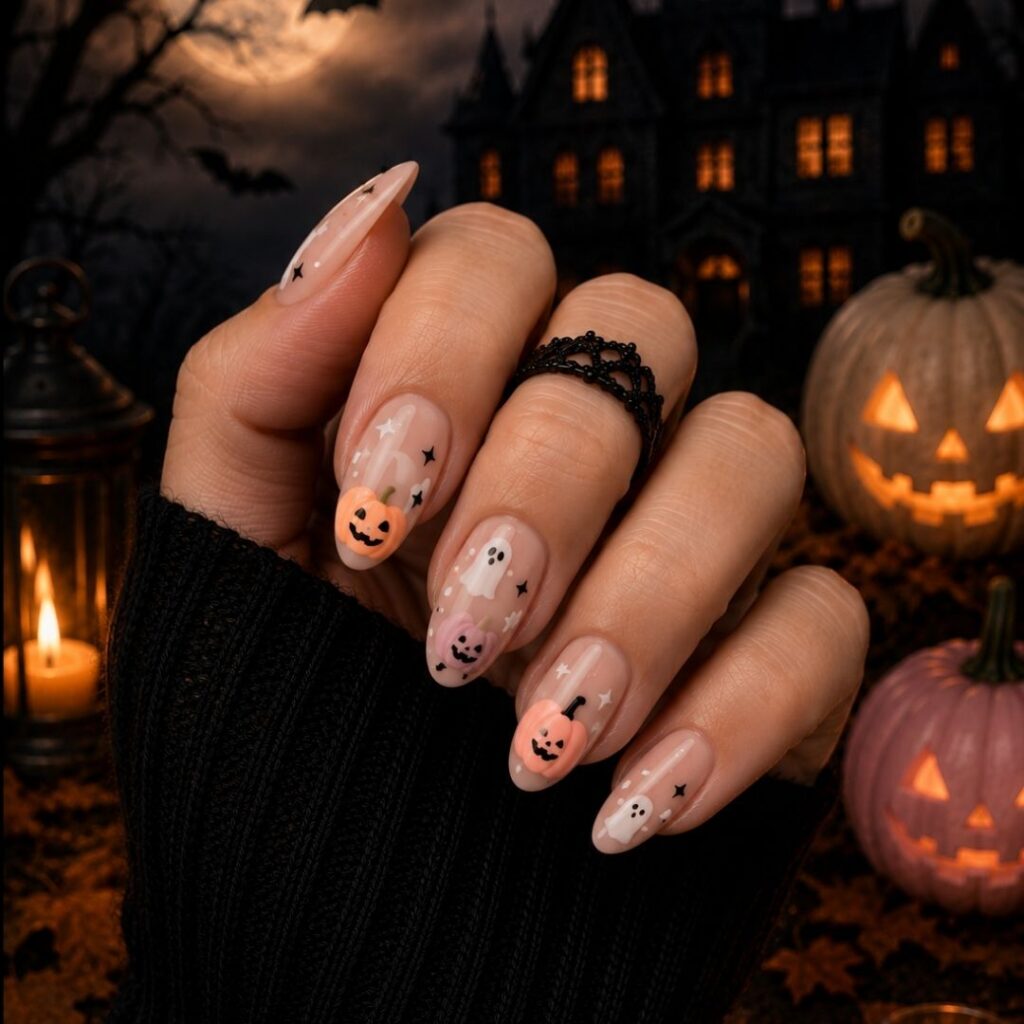
How to Make It
- Choose a Pastel Base: Apply two thin coats of your favorite pastel shade.
- Paint Mini Pumpkins: Use muted orange, peach, or pink.
- Add Stems: Use green or brown for tiny stems.
- Add Minimal Details: Include small dots or delicate stars if desired.
- Finish: Apply a glossy top coat.
Pro Tip: Choose muted pastels rather than mixing too many bright colors. The result feels more sophisticated and cohesive.
7. Pumpkin and Bow Nails
For a feminine twist, combine tiny pumpkins with delicate bows. The contrast between the seasonal pumpkin and soft bow detail creates a manicure that feels playful, pretty, and distinctly 2026. A nude, milky white, or pale pink base works beautifully with orange pumpkins and black, burgundy, or pink bows.
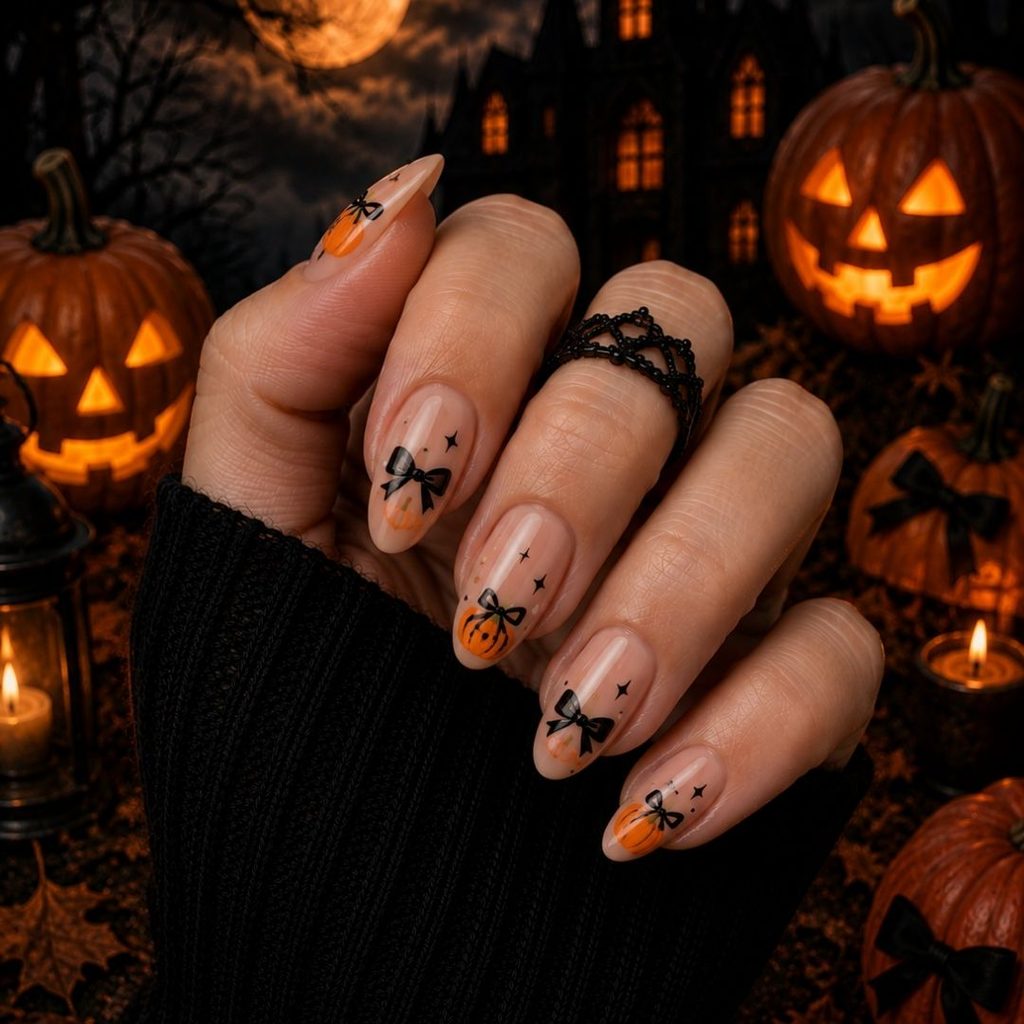
How to Make It
- Apply a Neutral Base: Use nude, milky white, or pale pink.
- Create the Pumpkin: Paint small orange pumpkins on selected nails.
- Add Bows: Use a fine brush to create tiny bow shapes.
- Add Fine Details: Outline the designs if needed.
- Apply Top Coat: Seal the manicure once dry.
Pro Tip: Let either the pumpkins or bows take the lead. Keeping one element smaller prevents the manicure from looking overloaded.
8. Tiny Jack-O’-Lantern Nails
For a more recognizable Halloween statement, turn your miniature pumpkins into tiny jack-o’-lanterns. The trick is to keep the faces simple. Tiny triangular eyes and a small curved mouth can create the classic look without requiring complicated artwork.
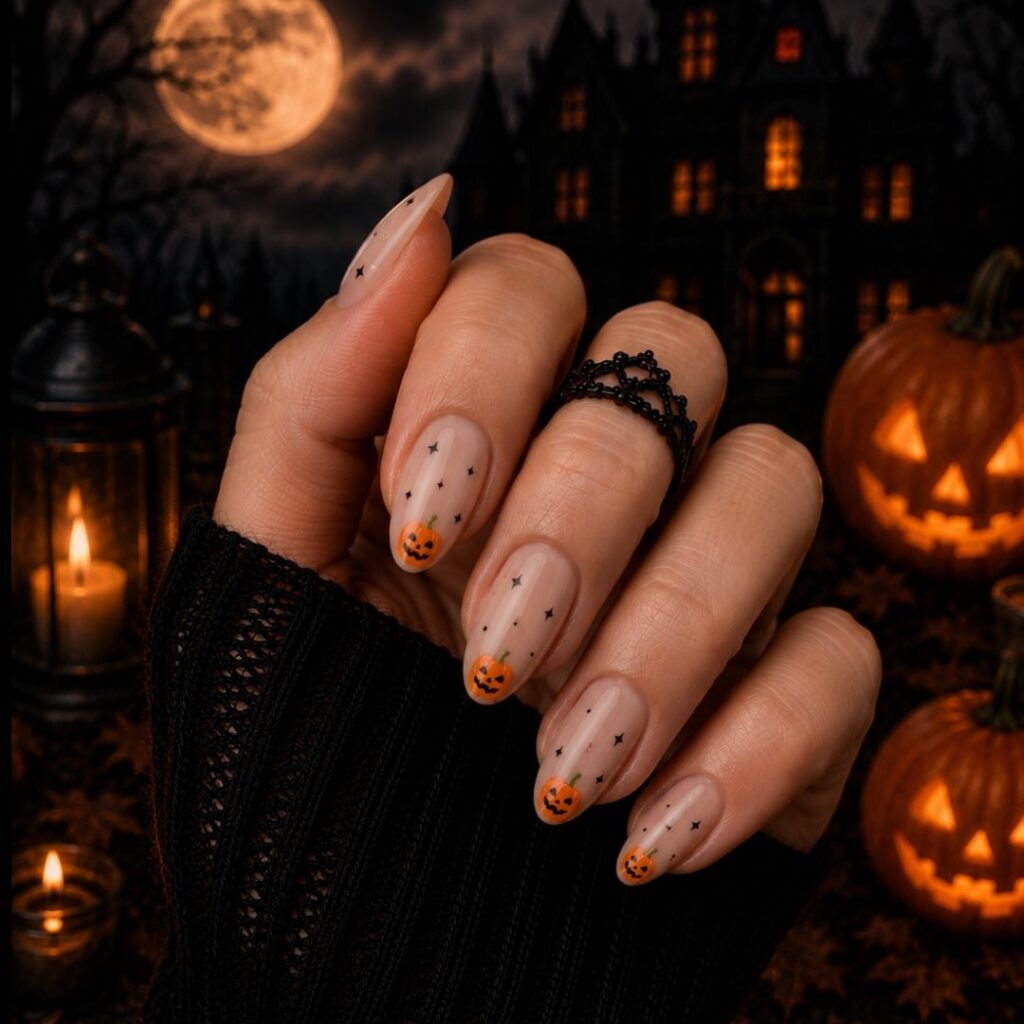
How to Make It
- Paint the Base: Choose cream, nude, orange, or black.
- Create Small Pumpkins: Use orange polish to form miniature pumpkin shapes.
- Paint the Face: Add tiny black eyes and a simple mouth.
- Add the Stem: Finish with a small green or brown stem.
- Seal the Design: Apply top coat carefully.
Pro Tip: Use a very fine detailing brush. Precision matters more than complexity when working on miniature designs.
9. Pumpkin Patch Short Nails
Bring the feeling of an autumn pumpkin patch to your manicure with several tiny pumpkins, leaves, and delicate vines. This design works beautifully when the artwork is scattered rather than placed in a strict pattern.
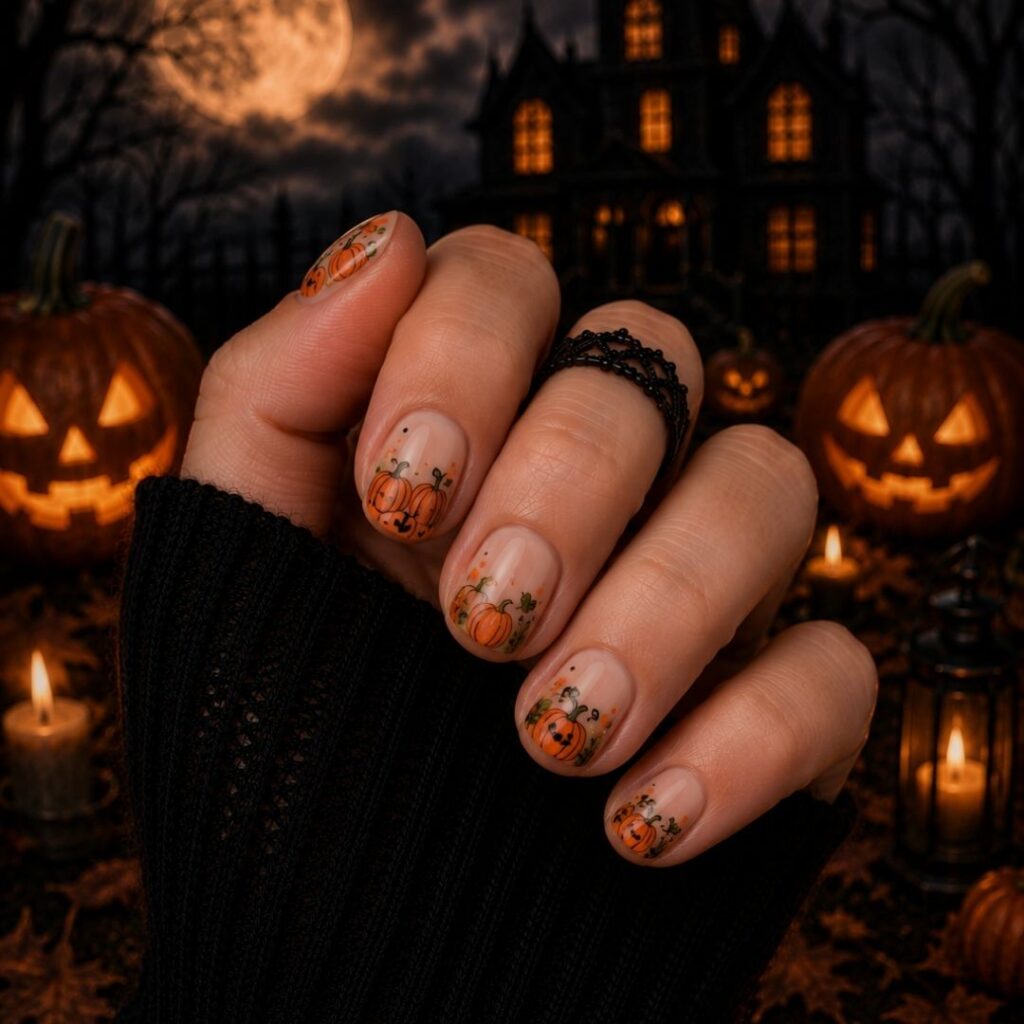
How to Make It
- Start With a Neutral Base: Cream, beige, or nude works particularly well.
- Paint the Pumpkins: Add pumpkins in different sizes.
- Add Leaves: Use green polish for small leaves.
- Create Vines: Add thin curved lines between the pumpkins.
- Finish With Top Coat: Seal the artwork.
Pro Tip: Vary the pumpkin sizes slightly. The difference creates dimension and makes the design feel more organic.
10. Orange and Nude Pumpkin Nails
If you want a classic Halloween manicure that still feels polished, orange and nude are an effortless pairing. The warm orange gives you the seasonal statement, while the nude base keeps the manicure modern and wearable.
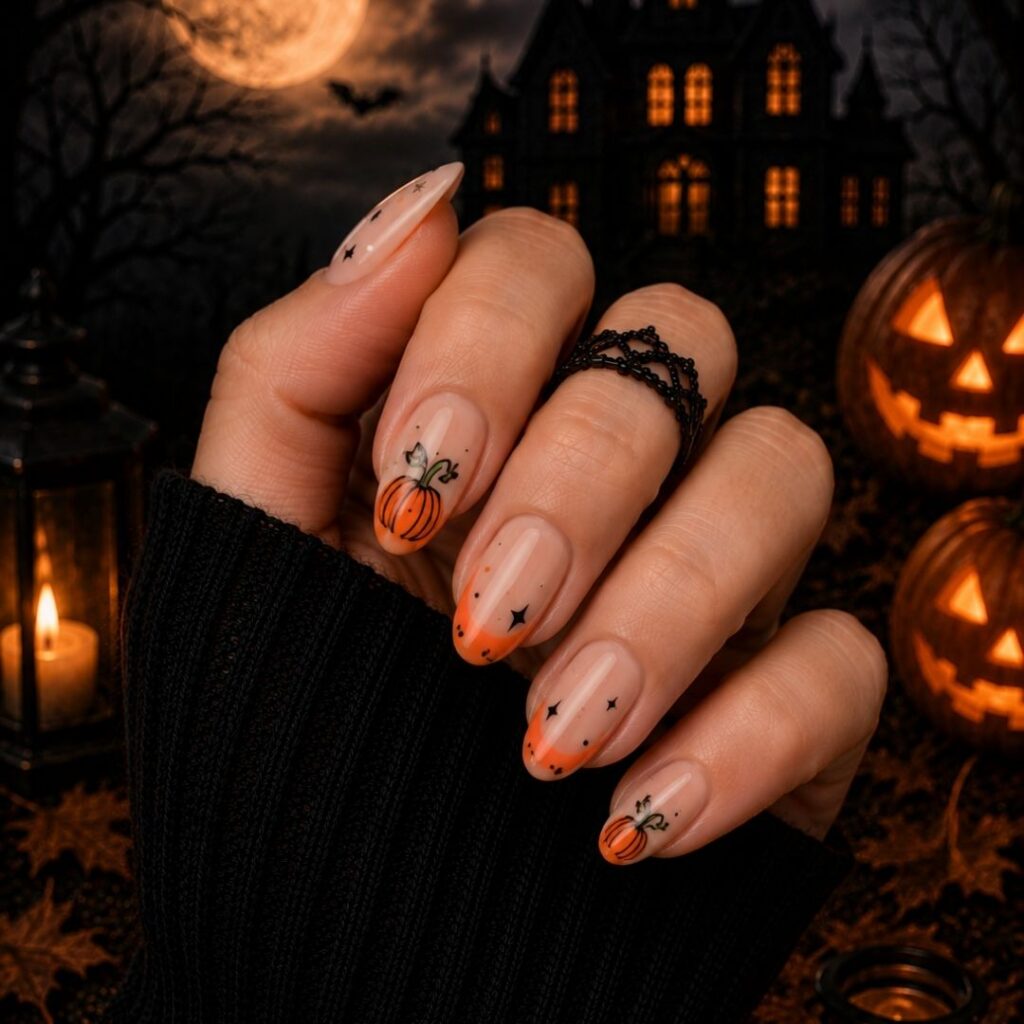
How to Make It
- Apply Nude Polish: Use one or two thin coats.
- Add Orange Details: Paint pumpkins, French tips, or small orange accents.
- Introduce Black Details: Add tiny outlines, stems, or minimalist Halloween motifs.
- Clean the Edges: Use a small brush with polish remover to refine the artwork.
- Apply Top Coat: Finish with a glossy top coat.
Pro Tip: Choose an orange that complements your skin tone and keep the nude shade close to your natural nail color for a seamless effect.
FAQs
Where to Wear Cute Pumpkin Halloween Nails ?
These designs are versatile enough for more than a Halloween party.
- Pumpkin Patch Outings: Try warm orange, nude, and autumn-inspired designs.
- Fall Dates: Keep the look soft with pastel pumpkins or delicate accents.
- Everyday October Style: Choose minimalist pumpkin accent nails.
- Halloween Parties: Choose jack-o’-lanterns, ghosts, and bold orange details.
- Costume Events: Go bolder with pumpkin-and-ghost combinations.
How to Make Cute Pumpkin Halloween Nails Look More Stylish ?
The secret to beautiful Halloween nail art is not necessarily adding more details. It is about balance. Start with a defined color palette and repeat the same shades throughout your manicure. If your pumpkins are bright orange, pair them with softer neutrals rather than introducing too many competing colors. Negative space can also make a major difference. Leaving parts of the nail visible creates a lighter, more editorial finish—especially when working with short nails.
Cute pumpkin Halloween nails are proof that seasonal manicures can be playful without feeling over-the-top. From tiny jack-o’-lanterns and smiley pumpkins to elegant French tips and pastel interpretations, there is a version for every personal style.
Personally, I would choose this kind of manicure for Halloween because it captures exactly what I love about the season: a little spooky, a little sweet, and completely expressive.
Looking for more style inspiration and curated content? Discover the latest trends, how-to guides, and elevated edits—visit our blog page and explore more.
[…] Cute Pumpkin Halloween Nails: 10 Designs for 2026 Blood Drip Halloween Nails: 10 Designs to Try in 2026 Black Spiderweb Nails: 6 Spooky-Chic Ideas 2026 5 Ghostly White Halloween Nails: Spooky-Chic Ideas 10 Halloween Nail Art Ideas for Short Nails […]