Learn how to create Lace Noir Nails with a step-by-step tutorial. Discover materials, stamping techniques, freehand options, and pro tips for a polished, long-lasting manicure.
If you’re shopping these pieces on Amazon, tools like Add My Cart turn outfit planning into a seamless experience—letting you share your entire curated look in a single link. It’s an effortless, polished way to invite friends into your style vision, without cluttering the conversation with multiple URLs.
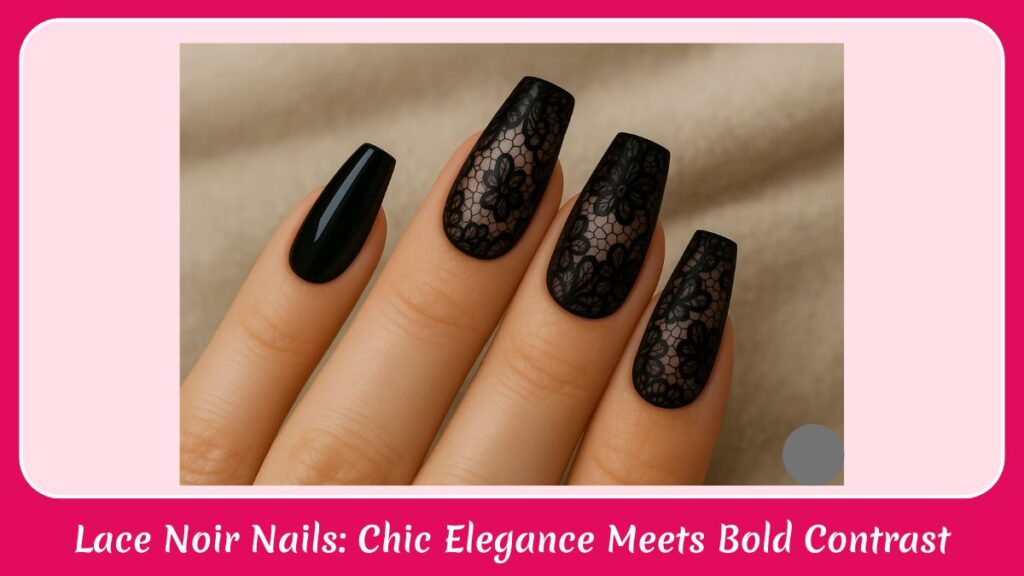
Noir Nails for a Statement Look
Nails are more than just a beauty accessory—they’re a canvas for style, mood, and personality. Lace Noir Nails combine sheer elegance with dramatic black accents, resulting in a look that’s both sophisticated and fashion-forward. Whether you’re attending a glamorous event, a photoshoot, or elevating everyday style, this manicure allows your fingertips to make a statement without saying a word.
Lace Noir Nails: The Timeless Lace Noir
Elegance in Every Detail
The beauty of Lace Noir Nails lies in contrast and precision. Sheer nude polish provides a soft, ethereal canvas, while the black lace design adds bold drama. The combination feels delicate yet powerful, a manicure that balances elegance and edge effortlessly. Each nail is thoughtfully designed to ensure a harmonious flow between accent nails and lace motifs.
This manicure transcends trends—it’s a lifestyle statement. From chic daywear to evening glamour, Lace Noir Nails enhance any look. The design communicates confidence, creativity, and attention to detail, making it the perfect choice for those who love wearable artistry.
Design Breakdown Section: Anatomy of Lace Noir Mastery
Every element in Lace Noir Nails is intentional. The sheer nude background highlights the black lace, creating depth and dimension. Accent nails painted solid black provide dramatic balance, while the lace patterns act as intricate focal points. This manicure is a study in contrasts, blending structured polish application with delicate detailing, transforming your nails into miniature works of art.
Materials You’ll Need: Tools for Elegant Lace
Before starting, prep your workspace with bright lighting and an organized surface. Here’s your material checklist:
Base coat: To protect your natural nails
Sheer nude-colored nail polish: Creates a see-through lace effect
Black nail polish: For the solid accent nail
Nail art stamping kit: For detailed and consistent lace patterns
Lace-patterned stamping plate: Intricate etched lace designs
Black stamping polish: Highly pigmented for crisp transfer
Stamper and scraper: To pick up and apply the design
Dotting tool or fine-tipped nail art brush (optional): For freehand lace painting
Top coat: To seal the design and add shine
Nail file: To shape nails into coffin, ballerina, or stiletto forms
Nail polish remover & cotton swabs: For precise cleanup
Step-by-Step Tutorial: Crafting Your Lace Noir Masterpiece
1. Prepare Your Nails: The Foundation of Style
Shape your nails using a file. Choose either a coffin/ballerina shape (tapered sides with flat tips) or a stiletto shape (pointed tip). Push back cuticles, buff the surface lightly, and remove oils with a little nail polish remover. Finish with a thin layer of base coat, letting it dry completely.
2. Create the Base Color: Laying the Canvas
For nails with lace patterns (index, middle, pinky), apply one or two thin coats of sheer nude polish. Let it dry fully—the nude base acts as the perfect backdrop for lace details.
For the solid black accent nail (thumb), apply one or two coats of black polish for full opacity. Allow each coat to dry completely.
3. Apply the Lace Design: Stamping Perfection
Apply Polish to Plate: Select a lace pattern from your stamping plate and apply black stamping polish.
Scrape: Hold the scraper at a 45-degree angle and remove excess polish.
Pick Up Design: Roll the stamper over the etched design to pick up the pattern.
Stamp on Nail: Roll the stamper firmly across your nude nail from one side to the other.
Clean Up: Use a cotton swab dipped in nail polish remover to tidy edges.
Repeat for each nail you want with a lace design.
4. Seal the Look: Shine and Longevity
Once designs are dry, apply a high-quality top coat generously across all nails. This protects the design, enhances shine, and extends the manicure’s life. Let nails dry fully—patience ensures a flawless finish.
Alternative Method: Freehand Painting
If you lack a stamping kit, you can attempt a freehand lace design. After prepping nails and applying base polish, use a fine-tipped brush or dotting tool with black polish to draw floral or lattice patterns. Let dry completely before sealing with a top coat.
Pro Tips: Secrets to a Perfect Lace Noir Manicure
- Precision matters: Take your time with stamping or freehand patterns.
- Balance your nails: Avoid overcrowding—strategically place lace motifs.
- Protect your work: Apply topcoat carefully over designs to prevent smudging.
- Patience is key: Allow each layer to dry fully before adding the next.
- Smooth canvas: Buffed, oil-free nails help polish and lace apply evenly.
How to Make This Look Last: Longevity Tips
- Reapply a topcoat every 2 days for shine and protection.
- Keep cuticles hydrated to avoid peeling.
- Use gloves during chores and avoid prolonged water exposure.
- Handle nails delicately to preserve intricate lace.
More Styles To Try
Where to Wear This Look: Noir Nails, Maximum Impact
Lace Noir Nails are perfect for bold, stylish occasions—cocktail parties, street-style photoshoots, evening outings, or fashion events. They also elevate everyday chic, adding refined edge and artistic flair to your style. These nails are made for making a statement wherever you go.
Final Thoughts: Mastering Elegance in Contrast
Lace Noir Nails are timeless, elegant, and daring. Sheer bases paired with dramatic black lace create a manicure that is both refined and expressive. With proper prep, careful execution, and a protective top coat, your nails become a wearable masterpiece that reflects confidence, creativity, and sophistication.
Looking for more style inspiration and curated content? Discover the latest trends, how-to guides, and elevated edits—visit our blog page and explore more.